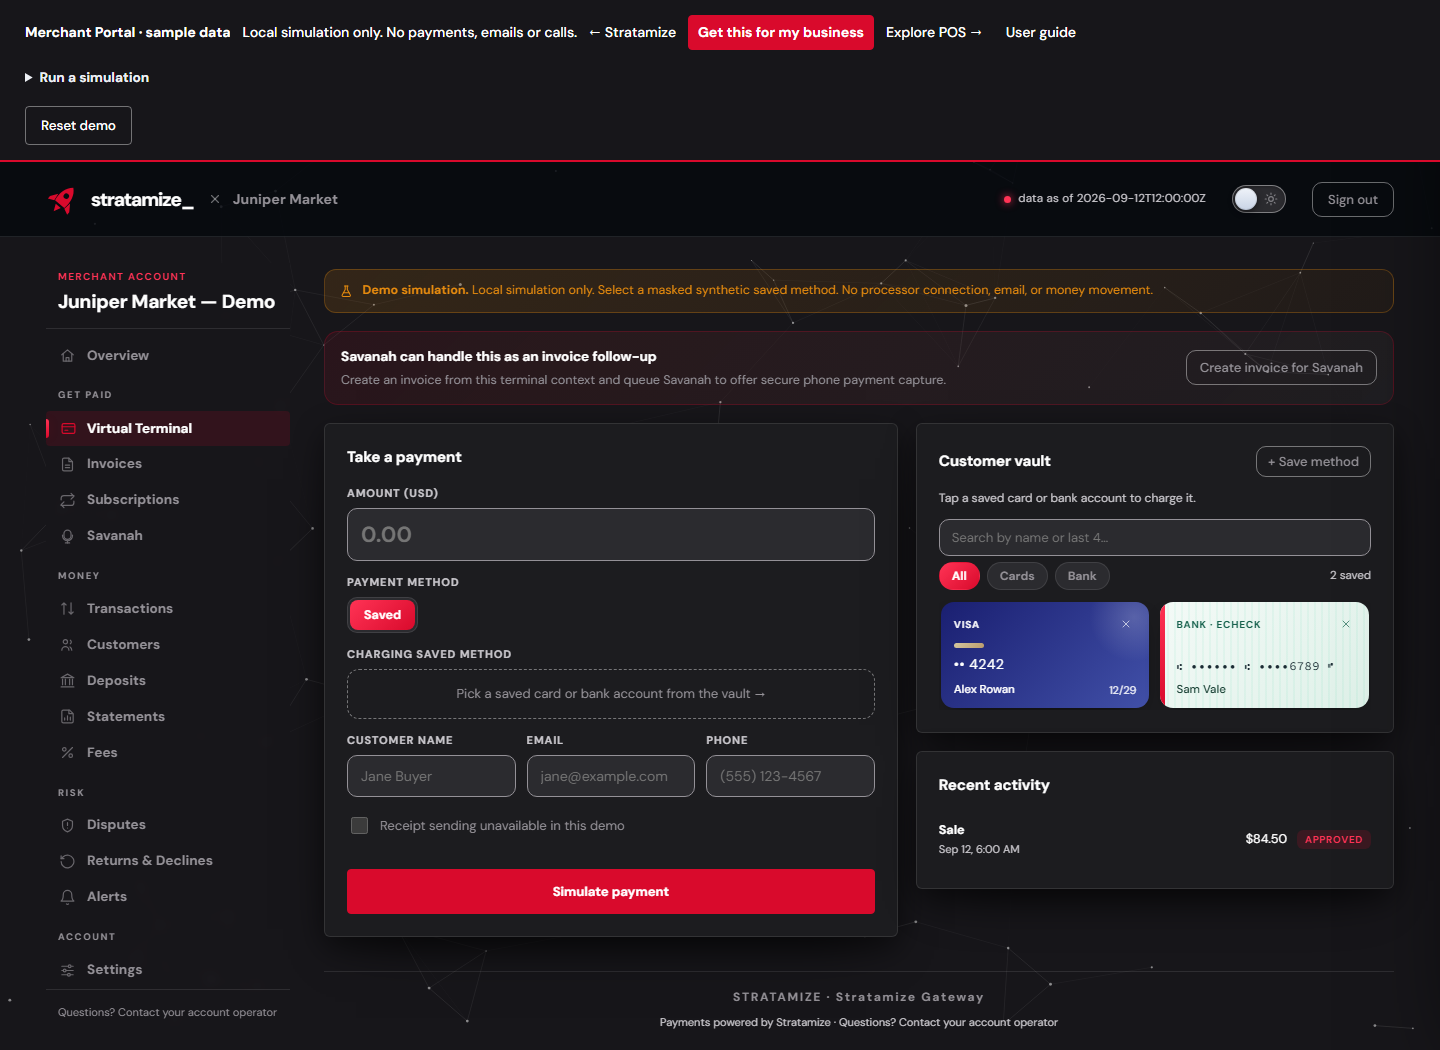
Use Virtual Terminal when your account is enabled to take payments and you are authorized to charge the customer. Available methods depend on the business's processing setup and your access.
Prepare and submit
- Open Virtual Terminal and read its mode or availability notice.
- Enter Amount (USD).
- Choose an available method. Saved uses an existing masked method; New card and New bank appear only on supported configurations.
- For a saved method, select an entry in Customer vault. Verify name, type, and last four digits in Charging saved method.
- Check customer details. New-method forms can require name, email, billing address, and ZIP. Enter payment details only in designated payment fields.
- Review Total to charge, including displayed tax or service fees, with the customer.
- Submit once and wait for the result. Record the transaction reference and check Recent activity and Transactions.
The result does not establish when a bank deposit will arrive. See payment statuses.
If entry or submission is unavailable
If secure fields fail to load, refresh before submitting. If submission may already have occurred, check its outcome first. Do not substitute notes or email for secure card entry. If no browser payment method is enabled, contact the operator.
In the demo, the only supported terminal method is a synthetic saved method and the button reads Simulate payment. It moves no money and sends no receipt. See practice in the demo.